How to Upgrade a Managed Access-Point via tftp and SSH - DWS-3160-Series
NOTE: This is a procedure in case upgrading via switch is unsuccesful
Requirements:
1) FW: DWL-8610_FW_v_4.3.0.2_B053.tar (Please always check our website for new release)
2) PuTTY - http://www.chiark.greenend.org.uk/~sgtatham/putty/download.html
3) Tftp Server http://tftpd32.jounin.net/tftpd32_download.html (Install the “Standard Editiion” – depending on plataform 32 or 64 bit)
Step 1 – Download the firmware for the AP – In our example we have used the DLW-8610AP
Step 2 – Install and configure tftp server as follows:
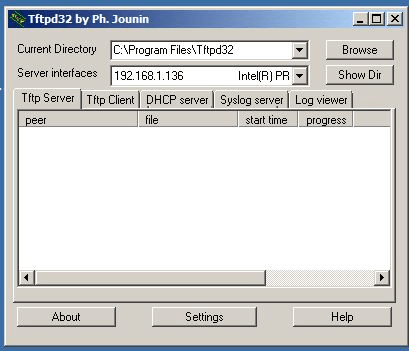
Current Directory: C:\Program Files\Tftpd32
Server interfaces: 192.168.1.136 (This is the IP address to where the tftp server resides)
Step 3 – Transfer the firmware downloaded and place into the “Current Directory”
In our example: C:\Program Files\Tftpd32
Step 4 – Enter the web GUI interface of the DWS-3160-24PC using its IP address in a web browser. In our example we have used the IP address of 192.168.1.161

You should be prompted with the login page – Login with your details (Our example was: admin and password: admin)
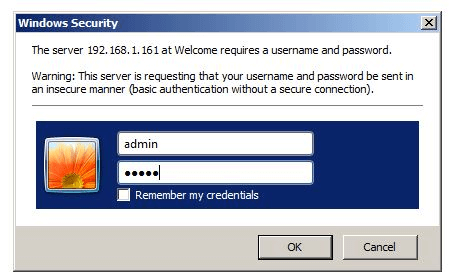
Click “OK”
Step 5 – Change AP status to “Debug Mode” – You will need to identify the MAC address of the problematic AP
WLAN > Administration > AP Management > Advanced Settings
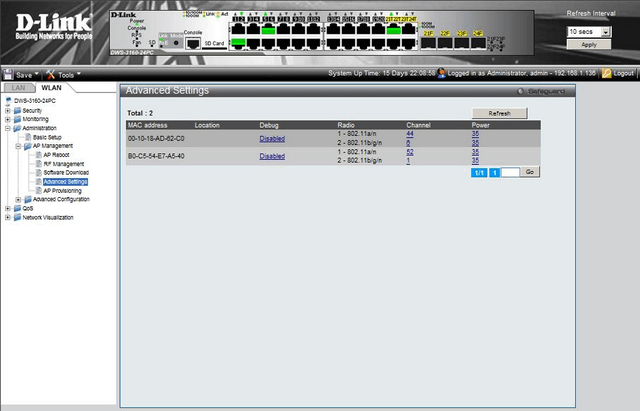
Step 6 – Click the link against the MAC address you want to manually upgrade under “Debug”

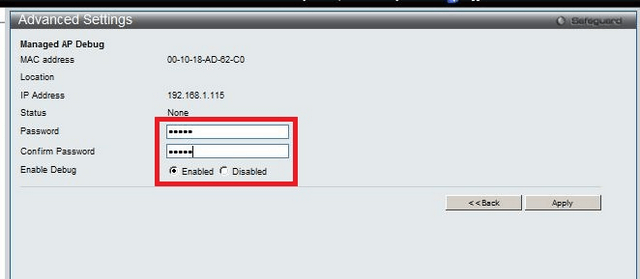
Click “Enabled” then enter the password – In this example we have used “admin” as the password. You will also need to remember the IP Address
Click “Apply”
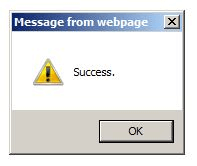
Click “OK”

Click “Refresh”

Step 7 – Once the “Debug” status shows “Enabled” then open PuTTY and configure as follows:
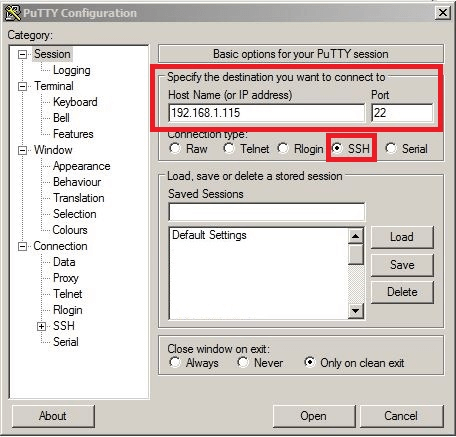
Once completed above, click “Open”
Step 8 – You should be prompted to login as follows:
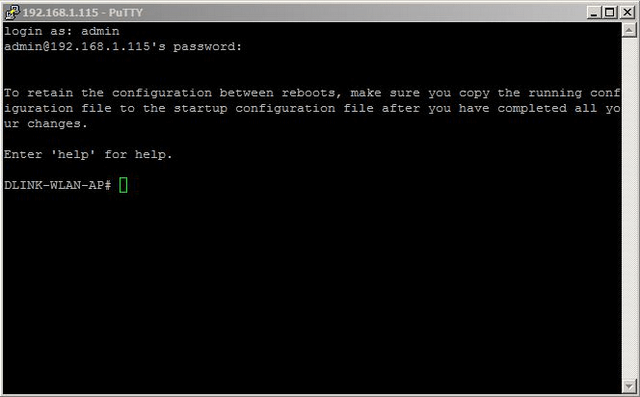
login as: admin
[email protected]'s password: admin (as per Step 6)
Once you have successfully logged in, type the following command:
DLINK-WLAN-AP# firmware-upgrade tftp://192.168.1.136/DWL-8610_FW_v_4.3.0.2_B053.tar
You need to enter the FULL file with extension:
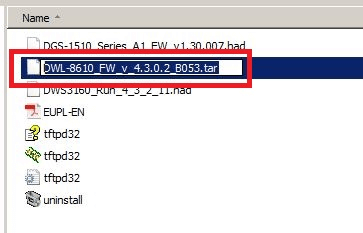
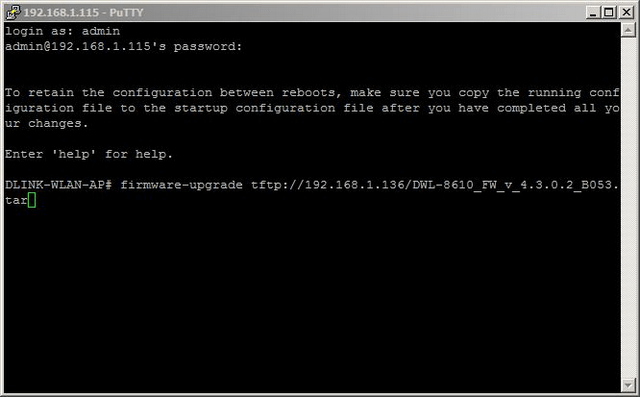
You should see the following screen to illustrate the tftp transfer is in progress
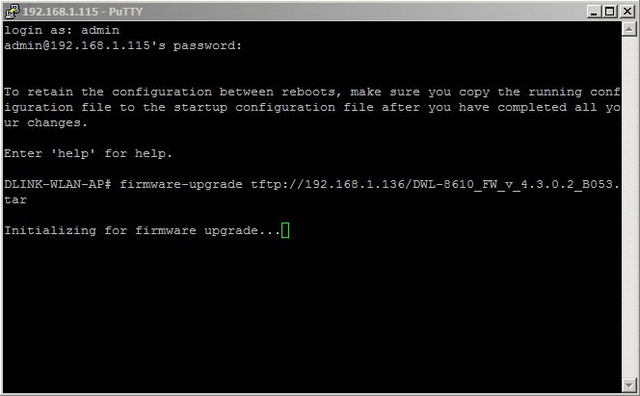
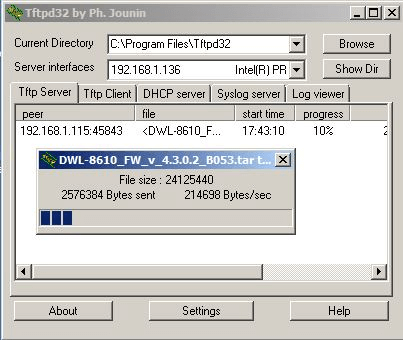
Step 9 – Due to this is a SSH connection and not Console, the session you have with PuTTy will have terminated and no screen feedback will be shown on the progress.
To check when the upgrade has completed go to “Advanced Settings”
WLAN > Administration > AP Management > Advanced Settings

Click “Refresh” until the “Debug” status shows “Disabled” – NOTE: The AP will disappear from the above list… the AP is in “Reboot” Mode and will return.
Once you have the above status “Disabled”, then the AP has successfully been upgraded.
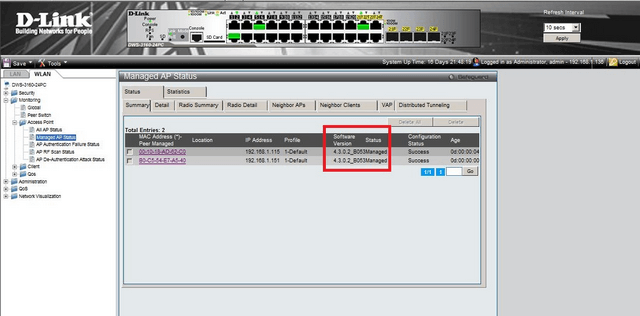
Step 10 – To confirm this, you may go to “Managed AP Status”
WLAN > Monitoring > Access Point > Managed AP Status
Ceci peut également aider.
- $name Lire la réponse
- $name Lire la réponse
- $name Lire la réponse
- $name Lire la réponse
- How to Configure Multiple SSIDs and VLANs - DWS-3160-Series Lire la réponse
- $name Lire la réponse
- $name Lire la réponse
- How to Upgrade a Managed Access-Point via tftp and SSH - DWS-3160-Series Lire la réponse