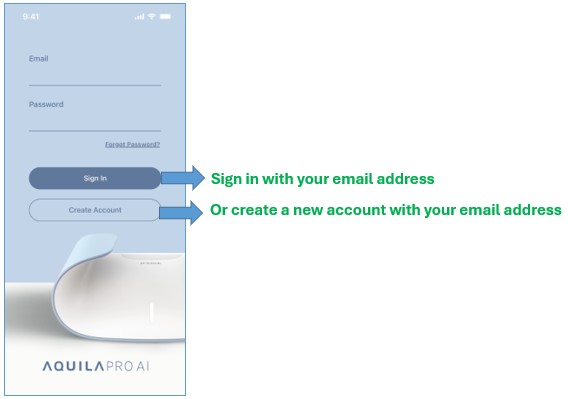
Step 1: Launch the AQUILA PRO AI app, and then log in with your D-Link account.
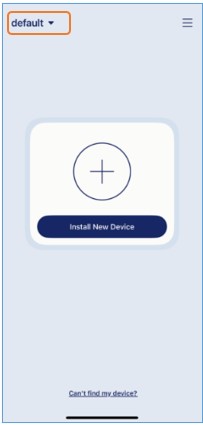
Step 2: Choose a Location for your smart plug. By default, you have a default location.
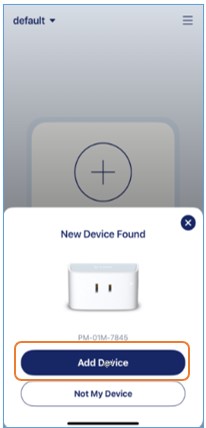
Step 3: Power up your smart plug and wait for the status LED to flash orange. A prompt will appear within 30 seconds. Tap Add Device.
Note: Make sure Bluetooth is enabled on your mobile device in order to find the smart plug. If you’re not automatically prompted, tap  to add the device.
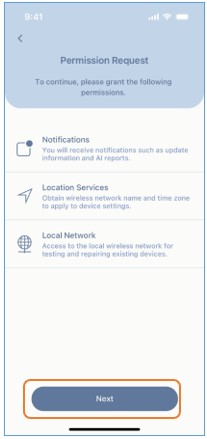
Step 4: You’ll be prompted to allow the app to use your mobile device’s Notification, Location and Local Network. Tap Next to continue.
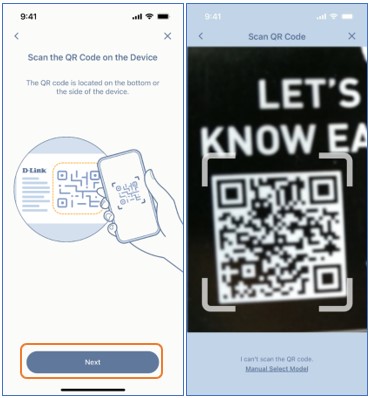
Step 5: Tap Next to scan the QR code on the side of the device.
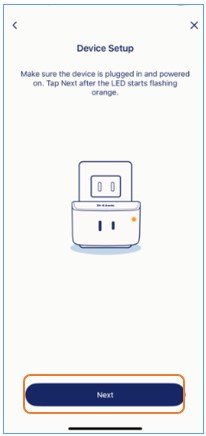
Step 6: Make sure the device is plugged in and powered on. Tap Next after the LED starts flashing orange.
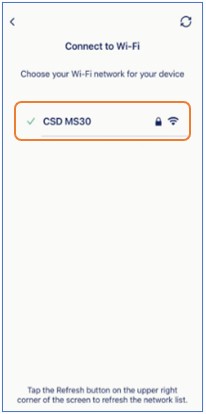
Step 7: Choose a Wi-Fi network for your smart plug.
Step 8: Enter the Wi-Fi password. Then tap Confirm.

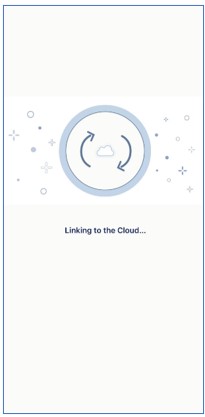
Step 9: Wait while the device is connecting to the cloud.
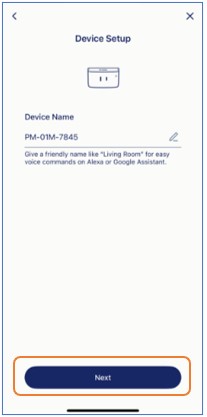
Step 10: Give your device a new name. Then, tap Next.
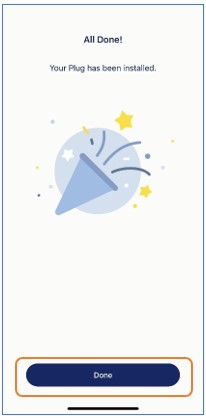
Step 11: The device has been set up successfully. Tap Done
 .
.
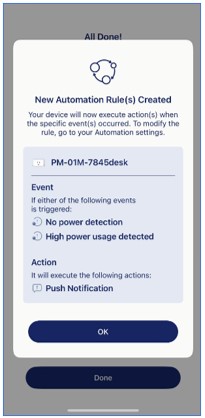
Step 12: New automation rules have been created automatically. Please tap OK to continue.
Step 13: Check how Power Activity Detection works. Tap Done to finish this setup.
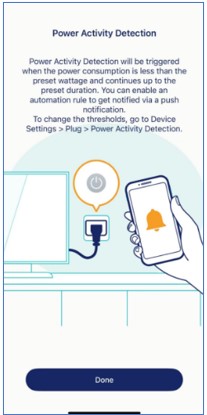
Note: This feature allows you to set a threshold for power usage. If the connected device uses less power than the preset wattage for a certain duration, a push notification will be sent based on your automation rule. To adjust the thresholds of your smart plug using the AQUILA PRO AI app, please refer to: “What is the Power Activity Detection feature on my smart plug, and how can I configure it?”